15 Food Container Organization Ideas for Messy Cabinets

Fifteen fixes for the container cabinet that avalanches every time you open it — a ruthless match test, lids filed upright, pull-out shelves, clear zones for cans, dry goods and snacks, and a five-minute reset that keeps it sorted.
Table of Contents (15 Ideas)
- 1.Start With the Match Test: Every Base Finds Its Lid, or It Leaves
- 2.File Lids Vertically in a Rack, Never Nested on Top
- 3.Commit to One Nesting Set, in One Shape: Square
- 4.Turn a Deep Drawer Into Container Headquarters
- 5.Add a Pull-Out Shelf So the Back Row Exists Again
- 6.Mount a Lid Holder Inside the Cabinet Door
- 7.Corral Small Round Containers on a Lazy Susan
- 8.Use a Tiered Riser for Cans Sharing the Cabinet
- 9.Decant Dry Goods Into Uniform Clear Canisters
- 10.Make a Clear-Bin Snack Zone at Kid Height
- 11.Build a Lunch-Packing Station in One Drawer
- 12.Corral Water Bottles in a Bin, With Caps and Straws in a Cup
- 13.Label and Date Leftovers So Fridge Containers Rotate
- 14.Stack Square Containers on the Upper Shelf, on a Riser
- 15.Do the 5-Minute Weekly Container Reset
You open the cabinet to put one clean container away, and three lids slide out onto the counter. Sound familiar? That little avalanche is not really a storage problem. It is a too-many-shapes, no-home-for-lids problem, and it is fixable in one afternoon.
These 15 ideas are how I sort out kitchen cabinet organization containers in real homes, starting with a ruthless match test and ending with a five-minute weekly reset that keeps it that way. Most of it uses what you already own. A standard base cabinet is about 24 inches deep, which is exactly why things vanish at the back, so several ideas here are about making that depth reachable instead of fighting it.
Start at idea one, even if it feels drastic. Once the orphans are gone, every other step gets easier, and you will finally see how much storage you actually have.
Before you start
You need a counter you can empty things onto, a recycling bag, and about an hour. Work in this order: match test first, homes for lids second, zones third. Do not buy a single organizer until the match test is done — half the people I help end up needing nothing new at all, just fewer, better homes for what survived the clear-out.
Start With the Match Test: Every Base Finds Its Lid, or It Leaves

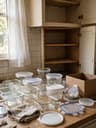
Empty the whole cabinet onto the counter. Yes, all of it, including the takeaway tubs hiding at the back. Now pair every base with its lid, clicking each one shut to check it actually seals. Anything warped, cracked, stained beyond saving, or left without a partner goes out today — recycling where you can, donation box for the decent spares. Most kitchens I see lose about a third of the pile at this stage, and that is the point. Keep only what fits the way you really eat: a few 1-cup rounds for sauces, four or five 4-cup squares for leftovers, two big ones for soup. If the wider cabinet still feels chaotic after this, our kitchen cabinet organization ideas cover the rest of the cupboards too.
File Lids Vertically in a Rack, Never Nested on Top

Storing containers with their lids on wastes a shocking amount of space, and stacking lids flat just makes a slippery pile. Split them up instead. Bases nest or stack on one side, and every lid gets filed upright in a simple rack, the same way you would file plates. A small wire rack or a repurposed dish rack works, and you can flick through the lids in seconds to find the right size. Sort them big to small so your eye learns the order. Round lids at one end, square at the other. This one change ends the morning routine of trying four lids on one tub while your coffee goes cold, and it costs about $10 if you buy a rack new.
Commit to One Nesting Set, in One Shape: Square

If you buy nothing else, buy one good nesting set and let the random collection retire. Square containers earn their shelf space — they sit flush against each other and the cabinet walls, with none of the dead corners round tubs leave behind. One set in graduated sizes, say 1, 2, 4 and 8 cups, nests down into a single tidy stack when empty and lines up like bricks when full in the fridge. Glass feels heavy in a lunch bag, so many people keep glass at home and a lighter plastic set for work. Either way, one shape and one lid style means every lid fits several bases, which quietly removes half the matching stress from busy weeknights.
Turn a Deep Drawer Into Container Headquarters

If you have one deep drawer, around 8 to 10 inches, claim it for containers and do not share it with anything else. Drawers beat cabinets here because you look down on everything at once — nothing hides at the back. Drop in a couple of dividers so the drawer has zones: nested bases on the left, the lid rack standing at the back, small rounds in front where little hands and quick lunches need them. Keep the drawer near the dishwasher if you can, because putting away is the moment containers usually get shoved anywhere. The same drawer logic works for heavy cookware too, as these pots and pans organization ideas show.
Three helpers worth the money
If you do buy, these three earn their space: a vertical lid organizer that files lids upright in the cabinet or on the door, a pull-out cabinet shelf on rails for that deep 24-inch base cabinet, and a set of bamboo drawer dividers that turn one deep drawer into proper zones. Buy them after the clear-out, measure twice, and skip anything else until you have lived with the new setup for a month.
Add a Pull-Out Shelf So the Back Row Exists Again

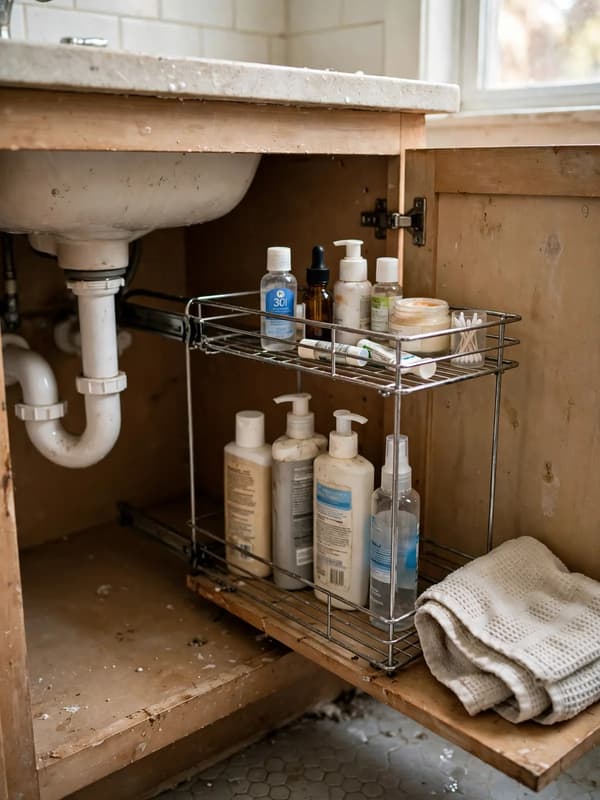
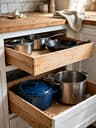
That 24-inch depth swallows containers whole. A pull-out shelf, the kind on simple metal rails, brings the back row to you with one tug, and suddenly the tub you bought in spring is usable again. Most retrofit shelves cost $30 to $60, fit a standard cabinet opening, and go in with four screws. Put everyday containers on the pull-out and keep rarely used party platters or the big stockpot up top instead. Measure the inside width and the door hinge clearance before you order — hinges steal about half an inch on one side. Deep corner cabinets are the worst offenders for lost containers, so pair this with our corner cabinet organization ideas if yours is a corner unit.
Mount a Lid Holder Inside the Cabinet Door

The inside of the cabinet door is free real estate most kitchens ignore. A slim rack or a couple of adhesive hooks mounted there holds six to eight lids flat against the door, right at eye level when you open it. Keep your most-used lids here — the 4-cup square lids you grab daily — and file the rest in the rack from idea two. Check the gap before you buy: the rack needs about an inch of clearance so it does not crash into the shelf edge or the containers inside when the door closes. Open and shut the door slowly the first time. It sounds small, but door storage is often the difference between a cabinet that works and one that just about works.
Corral Small Round Containers on a Lazy Susan

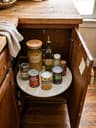
Little round tubs — the yogurt-pot size, the sauce pots, the baby-food jars — roll into corners and die there. Sit them on a lazy susan instead. A 10 or 12 inch turntable fits most base cabinets, spins with one finger, and keeps every small pot visible around the rim. Keep it to one layer; the moment you stack on a turntable, the spin sends things flying. This is also a kind spot for the odd-shaped bits that do not nest with your main square set. Give the tray a quick wipe when you do the weekly reset, because small tubs always seem to leak a little, and a clean base stops the whole cabinet smelling of last Tuesday's curry.


Use a Tiered Riser for Cans Sharing the Cabinet

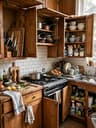
In lots of homes, cans and containers share one cabinet, and the cans lose — lined up flat, you can only see the front row. A stepped riser fixes that in a minute: three tiers, cans standing like seats in a little stadium, every label visible at a glance. Put beans and tomatoes on the bottom step, soups in the middle, small tins of tuna or sweetcorn up top. That simple stadium layout is kitchen cabinet organization canned food at its most practical, and it stops you buying a fourth tin of chickpeas because you could not see the three at the back. Leave the neighbouring shelf for your container stacks, and keep a small gap between the two zones so hands are not knocking tins into tubs. If spices crowd the same cupboard, our spice organization ideas will sort that shelf too.
Decant Dry Goods Into Uniform Clear Canisters

Half-open bags of flour and rice are why cabinets feel messy even when the containers behave. Decant the regulars — flour, rice, pasta, oats, lentils — into uniform clear canisters with lids that all open the same way. Same-height jars in a row calm the whole shelf down, and you can see at a glance when rice is running low. Add a small scoop in the big jars so you are not digging with a mug. Keep the original cooking times on a bit of tape on the back if you need them. This is kitchen cabinet organization dry goods done simply: no labels you have to print, no decanting things you buy once. For overflow bags and backup stock, our small pantry organization ideas pick up where the cabinet stops.
Measure before you organize
Two numbers run this whole project: your cabinet is probably 24 inches deep, and a standard shelf opening is often only 15 to 20 inches wide once the hinges take their share. Write both down before ordering racks, risers or pull-outs. Most returns, and most wobbly setups, come from organizers that were a half-inch too hopeful.
Make a Clear-Bin Snack Zone at Kid Height

If snacks live in the container cabinet, give them one clear bin on the lowest shelf and let that be the whole system. Bars, raisin boxes and fruit pouches go in loose, packaging and all, and kids can see exactly what is on offer without dragging everything out. At kid height, roughly the bottom shelf of a base cabinet, they can serve themselves and, just as important, put the bin back. This is kitchen cabinet organization for snacks that respects how families actually graze: one bin to pull out, one bin to push back, and a quick glance tells you when supplies run low. Keep adult treats and baking bits higher up, or every raid empties the lot by Thursday.
Build a Lunch-Packing Station in One Drawer

Weekday mornings fall apart in three places: finding a container, finding its lid, finding a bottle. Put the whole routine in one wide drawer and mornings get quieter. Left section: four lunch-sized containers with lids already paired underneath. Middle: reusable bags, a roll of wrap, and a couple of clean cloths. Right: bottles standing or lying in a row, ready to fill. Packing a lunch becomes one open drawer instead of a tour of the kitchen. If your drawer is shallow, stand bottles in a low cabinet next door and keep everything else together. It takes one Sunday to set up and pays you back five mornings a week, which is a trade I will take every time.
Corral Water Bottles in a Bin, With Caps and Straws in a Cup

Water bottles are tall, tippy, and somehow always in the way of the cabinet door. Stand them all in one open bin, like files in a box, so pulling one out does not domino the rest. Beside the bin, keep a small cup or mug for the loose bits that usually vanish: spare caps, straws, and those little silicone seals that fall out in the wash. When a bottle comes back from school or the gym, it goes bottle-in-bin, straw-in-cup, no thinking required. Cap the collection at what the bin holds — in our house that is six bottles for four people, and honestly four would do. Extra merch mugs and freebie bottles are the first thing to let go.
Label and Date Leftovers So Fridge Containers Rotate

The cabinet system works better when fridge containers stop coming back in mystery condition. Keep it low effort: a roll of masking tape and a marker living in the container drawer. Every leftover gets a strip of tape with what it is and the day it went in — chicken soup, Tues. Oldest containers move to the front of the fridge shelf, newest slide in behind, the same first-in, first-out habit shops use. It takes ten seconds and saves the sniff test completely. When a container comes back empty, the tape comes off in the wash and the tub returns to its set. Anything reaching day four gets eaten that night or goes, no debate, which keeps the fridge, and your container count, honest.
Stack Square Containers on the Upper Shelf, on a Riser

Upper shelves are where containers go to be forgotten, mostly because you can only see the front edge of the stack. Put a small riser or stepped shelf up there and stack your square set in two short piles instead of one tall wobbly tower — a pile of four is plenty. Squares matter even more up high, because a stable stack will not slide when you tug the bottom one out. Keep the overflow and seasonal bits up here: the big salad tub, the Christmas cookie boxes. Everyday sizes stay low, within easy reach. If you need a step stool for it, it is not everyday storage. That one rule, applied honestly, reshuffles most cabinets into the right order on its own.
Do the 5-Minute Weekly Container Reset

None of this survives contact with a real week unless something small maintains it. Pick a moment that already happens — while the kettle boils on a Sunday, or while Sunday dinner is in the oven — and give the cabinet five honest minutes. Containers that crept to the wrong shelf go home. Lids that got tossed in loose get filed. One quick count: any new orphans? Out they go, same day, before they breed. Wipe the shelf if something leaked. That is the whole job, and the timer matters, because five minutes feels doable on a tired evening in a way that reorganizing never will. Skip a week and nothing collapses. Skip a month and you are back to the avalanche, so tie it to the kettle and let it ride.
A calm container cabinet is not really about matching sets or pretty shelves. It is about opening the door on a tired Tuesday and finding a tub, its lid, and thirty seconds of your evening still intact.
Work through the match test, give lids a home of their own, and let the zones do the remembering for you. Then keep the five-minute reset tied to something you already do, and the avalanche stays gone. Start with the cabinet that annoys you most. That is the one that will convince you.
Food Container Organization FAQs
Expert answers & styling advice
How many food containers do I actually need? ▼
For most households, 10 to 14 good ones cover daily life: four small 1-cup pots for sauces and snacks, five or six medium 4-cup containers for leftovers and lunches, and two or three large ones for soup and salads. If every container is in the fridge or dishwasher at once, you have a laundry problem, not a storage one. Buy a second nesting set only when the first set is genuinely all in use twice in one week.
Should I store lids on or off the containers? ▼
Off, almost always. Storing lids on wastes the empty air inside every tub and makes stacking unstable. Bases nested together take up a fraction of the space, and lids filed vertically in a rack are faster to match than a pile. The one exception is a packed lunch drawer, where keeping two or three ready-paired sets saves real time on school mornings.
Glass or plastic containers — which is better for cabinets? ▼
Glass stacks neatly, does not stain, and goes from fridge to oven, but it is heavier and chips if a stack topples from an upper shelf. Plastic is lighter for lunch bags and cheaper to replace. Many homes land on glass at home, plastic for out of the house, with both in the same square shape so the system still feels like one set. Whatever you choose, one shape matters more than the material.
How do I stop containers taking over a small cabinet? ▼
Cap the collection at what one zone holds, and let that be a hard limit: one drawer, or one shelf with a lid rack. New tubs, like takeaway containers you wash and keep, only stay if something else leaves. Small cabinets also do better with the door rack and a pull-out shelf doing the heavy lifting, since both turn dead space into storage without adding a single container.
What do I do with takeaway containers? ▼
Keep a small, honest quota — say four tubs with lids that seal — for sending food home with guests or storing messy jobs like marinating. Recycle the rest as they arrive. Takeaway tubs are the main way cabinets refill after a clear-out, because each one feels too useful to throw away. A quota lets you keep the useful habit without quietly rebuilding the avalanche.