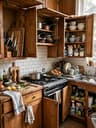
19 Kitchen Cabinet Organization Ideas for Every Cabinet

19 kitchen cabinet organization ideas that cover the whole kitchen — zone layout first, then uppers, lowers, doors and corners, with simple storage for small stuff and a 20-minute reset to keep it all working.
Table of Contents (19 Ideas)
- 1.Start With a Zone-Based Kitchen Cabinet Organization Layout
- 2.Use Shelf Risers Inside Upper Cabinets for Mugs and Glasses
- 3.Add Stackable Shelves for Bowls and Serving Dishes
- 4.Reserve the Highest Upper Shelf for Rarely Used Pieces Only
- 5.Fit a Pull-Down Shelf Unit in a High Upper Cabinet
- 6.Screw Mug Hooks Under Upper Cabinets
- 7.Mount Racks Inside Cabinet Doors for Lids and Measuring Cups
- 8.Convert One Lower Cabinet Into Deep Drawers for Pots
- 9.Install Roll-Out Pull Shelves So Nothing Hides at the Back
- 10.Use Vertical Dividers for Cutting Boards and Sheet Pans
- 11.Stand a Tiered Can Riser Inside a Cabinet
- 12.Drop a Lazy Susan Into a Deep Lower Cabinet
- 13.Try a Vertical Plate Rack So Plates Stand, Not Stack
- 14.Hang Under-Shelf Baskets for Packets and Small Items
- 15.Corral Small Loose Items in Labeled Bins
- 16.Build a Corner Appliance Garage for the Toaster and Blender
- 17.Give Trash and Recycling a Pull-Out Cabinet Near the Sink
- 18.Keep One Landing Zone Cabinet by the Door
- 19.Keep It Alive With a Quarterly 20-Minute Cabinet Reset
Most kitchens are not short on cabinets. They are short on a plan for what goes inside them — which is why the pasta lives with the mugs and the good pan is always behind three other pans.
These 19 kitchen cabinet organization ideas work through the whole kitchen: a sensible kitchen cabinet organization layout first, then ideas for upper cabinets, lower cabinets, doors, corners and all the awkward in-between spots. The last few are about kitchen cabinet organization storage for the small stuff, and one small habit that keeps the whole system alive.
You do not need to do all 19 this weekend. Pick the two cabinets that annoy you every single day — for most people that is the pan cabinet and the mug shelf — and start there. Everything here is renter-cautious too: only a handful of ideas need screws, and the rest slide, hang or stand exactly where you put them.
Measure before you buy anything
Ten minutes with a tape measure saves a pile of returns. Note the inside width, depth and height of each cabinet you plan to fix — most uppers are about 12 inches deep, most lowers about 24. Check how far doors swing and whether shelves are fixed or adjustable. Then buy for the cabinet you actually have, not the one in the product photo.
Start With a Zone-Based Kitchen Cabinet Organization Layout

Before you buy a single organizer, map your kitchen cabinet organization layout on paper. Draw four zones: prep, cooking, baking and cleaning. Prep tools live near your main stretch of counter, cooking gear near the stove, baking things near the oven or mixer spot, and cleaning supplies near the sink. The rule is simple — store each thing where your hands actually reach for it, not where it happened to land on moving day. Give this step 20 honest minutes; every idea after it works twice as well on top of a layout that makes sense.
Use Shelf Risers Inside Upper Cabinets for Mugs and Glasses

Most upper cabinets waste the top half of every shelf — there is a good 5 or 6 inches of air sitting above your mugs. A simple shelf riser, the kind that costs around $10 to $14 for a two-pack, splits that space into two levels. Short mugs go underneath, taller glasses on top. Measure your cabinet depth first; most uppers are about 11 to 12 inches deep inside, so a 10-inch riser fits with room to spare. Suddenly the same shelf holds nearly double, and nothing hides behind anything else.
Add Stackable Shelves for Bowls and Serving Dishes

Bowls are awkward stackers — one tall wobbly pile, and the bowl you want is always at the bottom. Stackable shelves fix that by giving each small stack its own level. Put everyday cereal bowls on the lower tier and serving dishes on top, or split dinner bowls from the big mixing bowls you only pull out on weekends. Bamboo and coated-wire versions both run about $15 to $25 and need no screws at all. Keep stacks to four bowls high at most; your wrists will thank you when you lift one down one-handed.
Reserve the Highest Upper Shelf for Rarely Used Pieces Only

Every kitchen has a top shelf that needs a step stool and a bit of nerve. Stop fighting it and give it one clear job: rarely used party pieces only. The punch bowl, the cake stand, the big holiday platter, the fondue pot from 2019 — up they go. What should never live up there is anything you use weekly, because you will either strain something reaching or quietly stop using it. A small folding step stool that tucks beside the fridge turns the twice-a-year climb into a non-event. Everyday things stay between waist and eye level, where they belong.
Fit a Pull-Down Shelf Unit in a High Upper Cabinet

If someone in your house is shorter, a high upper cabinet can feel designed for a different family. A pull-down shelf unit mounts inside the cabinet and swings the whole shelf down and out to counter height with one pull on the handle, then glides back up. They suit cabinets roughly 24 to 36 inches wide, hold around 15 to 20 pounds, and cost more than most ideas here — usually $120 to $200 — but for daily spices and oils it beats dragging a stool across the kitchen three times a day. Our spice organization ideas pair well with one of these.
Screw Mug Hooks Under Upper Cabinets

The underside of an upper cabinet is free storage most people never think about. A row of six to eight mug hooks screwed into that underside holds your everyday mugs in a neat line above the counter. It frees a whole shelf inside the cabinet and, honestly, a row of mugs looks good out in the open. Space the hooks about 3 inches apart, check the cabinet base is solid wood or thick enough to hold a short screw, and keep the heaviest stoneware mugs in the cabinet instead. Cheapest idea on this list at around $6 for a pack.
Three buys that punch above their price
If the budget only stretches to a few things, start here: a shelf riser two-pack for the mug cabinet (about $12), a roll-out shelf kit for the deep lower cabinet you dread (about $60), and a set of clear labeled bins for the small-stuff shelf (about $15). Together they fix the three cabinets most people complain about, for under $90 all in.
Mount Racks Inside Cabinet Doors for Lids and Measuring Cups

Cabinet doors are flat, empty and begging for a job. A screw-in door-mounted rack on the inside of a cabinet door holds pot lids upright in a row — no more lid avalanche when you open the cupboard. A smaller rack or a few hooks next to it keeps measuring cups hanging in size order instead of rattling around a drawer. Measure the gap before you buy: the rack plus lids needs roughly 2 to 3 inches of clearance so the door still closes without kissing the shelves. This is kitchen cabinet organization storage at its sneakiest, because the space was always there.
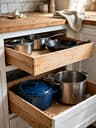

Convert One Lower Cabinet Into Deep Drawers for Pots

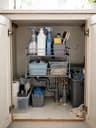
Lower cabinets with a fixed shelf are where pots go to disappear. If you are changing anything bigger in your kitchen, converting one lower cabinet into deep drawers is the upgrade people rave about for years. A drawer 10 to 12 inches deep swallows a Dutch oven, stockpot and saucepans, and everything is visible from above instead of buried at the back. Full-extension runners matter — you want the drawer to pull all the way out. Pair this with our pots and pans organization ideas and the daily pot hunt is over.
Install Roll-Out Pull Shelves So Nothing Hides at the Back

Not ready to rebuild a cabinet? A roll-out shelf kit gives you most of the drawer effect for much less. The shelf mounts on runners inside a standard lower cabinet and slides out like a tray, so the jars at the back roll forward into daylight. Kits for a typical 24-inch cabinet run about $50 to $90, fit with a screwdriver and a spare half hour, and many are rated for 75 pounds or more. Start with the cabinet you curse at most, usually the deep one beside the stove.
Use Vertical Dividers for Cutting Boards and Sheet Pans

Cutting boards and sheet pans stored flat become a sliding, clattering pile. Stored upright with vertical dividers, they file like books — pull one out, slide it back, done. A tension-mounted divider rack costs around $15 to $25, or a carpenter can build fixed wooden slots into a narrow cabinet for a cleaner look. The skinny cabinet above the oven or beside the fridge, the one that fits nothing else, is perfect for this. Measure your tallest board before ordering; most racks handle boards up to about 20 inches. This is also prime territory if you are tackling a tricky corner cabinet nearby.
Stand a Tiered Can Riser Inside a Cabinet

Cans stored in rows hide each other — you end up buying a third tin of chickpeas because the first two were crouching behind the soup. A tiered can riser, basically a little staircase for your shelves, lifts each row above the one in front so every label shows at a glance. Most are about 10 inches wide, expandable versions exist for wider cabinets, and they cost roughly $12 to $18. Group by type — soups together, beans together, vegetables together — and put the oldest cans at the front. Ten minutes of setup, and the mystery-can guessing game is over.
Drop a Lazy Susan Into a Deep Lower Cabinet

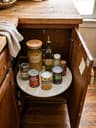
Oils and sauces migrate to the back of a deep lower cabinet and quietly expire there. A lazy susan turntable — 16 to 18 inches suits most base cabinets — puts the whole group on a spin. One turn brings the soy sauce from the back to your hand. Pick a model with a small raised lip so bottles do not slide off mid-spin, and load it with sturdy bottles, not tall wobbly ones. It shines in a corner unit too, which is why it sits at the heart of so many corner cabinet organization ideas. Expect to pay $14 to $30.
Try a Vertical Plate Rack So Plates Stand, Not Stack

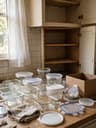
A stack of twelve dinner plates weighs more than you think, and the bottom plates live a hard life. A vertical plate rack stores plates upright in individual slots, like files in a drawer, so you lift one out sideways instead of heaving the whole pile. Bamboo racks around $20 fit inside a wide upper or lower cabinet; built-in versions suit a deep drawer. Measure plate diameter first — many racks cap out around 10 to 11 inches. Chipped rims drop off fast with this setup, and setting the table gets strangely satisfying.
Upper, lower, inside — think in three passes
When a whole kitchen feels overwhelming, work in passes instead of all at once. Pass one: upper cabinets — light things, daily dishes, glasses. Pass two: lower cabinets — heavy pots, appliances, bins. Pass three: the inside extras — door racks, under-shelf baskets, labels. One pass per weekend is a calm pace, and each pass makes the next one easier to see.
Hang Under-Shelf Baskets for Packets and Small Items

There is a dead strip of space under every cabinet shelf, and under-shelf hanging baskets claim it without a single screw. The wire arms slide over the shelf above and the basket hangs below, ready for seasoning packets, tea bags, stock cubes and all the small flat things that otherwise drift around a drawer. They cost about $8 to $12 each and add maybe 4 inches of drop, so check taller items still fit underneath. One basket for cooking packets and one for tea and coffee bits keeps two different messes in two tidy places. Small change, daily difference.
Corral Small Loose Items in Labeled Bins

Every kitchen has a cabinet where small things go to form a junk pile — cookie cutters, measuring spoons, twist ties, the good scissors. Clear labeled bins are the honest fix, and they are the backbone of good kitchen cabinet organization storage: one bin for baking bits, one for measuring gear, one for wraps and ties. Clear sides show the contents at a glance, and a label tells everyone where things go back. Bins around 10 by 6 inches fit most shelves; a set of three is usually $12 to $18.
Build a Corner Appliance Garage for the Toaster and Blender

Toasters and blenders earn their counter space on weekends and just sit there looking bulky all week. An appliance garage — a corner cabinet at counter level with a lift-up or roll-up door — hides them behind a front that matches your kitchen, plugged in and ready. Slide the toaster forward, use it, push it back, close the door: clear counters in ten seconds. Retrofit kits and simple hinged-door versions both exist, and even a carpenter-built one is a modest job. Keep the inside at least 16 inches deep so a standard blender fits with its jug on.
Give Trash and Recycling a Pull-Out Cabinet Near the Sink

A bin standing in the middle of the kitchen floor is nobody's favorite look. A pull-out trash cabinet hides two bins — one for trash, one for recycling — inside a lower cabinet, ideally the one beside or under the sink where peelings and packaging actually happen. The frame pulls out on runners, and the bins lift straight out on bin day. Standard setups fit an 18-inch-wide cabinet and run $80 to $150 for the kit. If your under-sink space is a tangle of pipes and bottles, our under-sink organization ideas will help you sort that cabinet first.
Keep One Landing Zone Cabinet by the Door

Pick the cabinet nearest the kitchen door and make it the household landing zone: lunchboxes, water bottles and reusable bags live there and nowhere else. Mornings run smoother when the lunchbox is grabbed on the way past instead of hunted through three cabinets, and evenings are easier when bags come home to one known spot. A couple of hooks inside the door take spare tote handles. It also pairs neatly with sorted food container organization ideas — lids and boxes in one cabinet, bottles and bags right beside them. Small cabinet, outsized effect on school-day chaos.
Keep It Alive With a Quarterly 20-Minute Cabinet Reset

No system survives a year of real cooking untouched — lids wander and new gadgets sneak in. The fix is a quarterly reset that takes about 20 minutes: set a timer, empty nothing fully, and just work shelf by shelf. Bin anything expired, move strays back to their zone, wipe the shelf you can reach, and donate the duplicate you have walked past for months. Put it on the calendar with the change of each season so it actually happens. Twenty minutes, four times a year, is all that stands between an organized kitchen and a slow slide back to chaos.
A well-organized cabinet is not really about matching containers or a perfect photo. It is about opening a door and finding the thing you wanted in about three seconds, every time, even on a tired Tuesday.
Start with the layout, fix the cabinet that annoys you most, and let the rest follow over a few weekends. Upper cabinets get risers and hooks, lower cabinets get drawers, pull shelves and turntables, and the small stuff gets bins with honest labels. Your kitchen already has the space — now it has a plan too.
Kitchen Cabinet Organization FAQs
Expert answers & styling advice
What is the best kitchen cabinet organization layout to start with? ▼
Start with zones. Group cabinets by job — prep near your main counter, cooking near the stove, baking near the oven, cleaning near the sink — and move things to the cabinet closest to where they are used. A zone-based kitchen cabinet organization layout makes every other organizer work better, because the right things are already in the right cabinet before you add a single shelf or bin.
How do I organize deep lower cabinets so things stop getting lost? ▼
Give the contents a way to come to you. Roll-out pull shelves, deep drawers and lazy susans all do the same job in different ways: they bring the back of the cabinet into the light. If the budget is tight, start with one roll-out shelf in the deepest cabinet and a turntable for oils and sauces. Vertical dividers handle the boards and pans that vanish in there too.
What should go in upper cabinets versus lower cabinets? ▼
Light and everyday goes up, heavy and bulky goes down. Upper cabinets suit glasses, mugs, plates and bowls — things you lift with one hand. Lower cabinets take the weight: pots, small appliances, cans and bins. Inside the uppers, keep daily things between waist and eye level and send rarely used party pieces to the highest shelf. It is the simplest rule in kitchen cabinet organization, and it prevents most strained reaches.
How much does kitchen cabinet organization storage cost to set up? ▼
A solid setup does not need a big spend. Shelf risers, under-shelf baskets and labeled bins run about $8 to $18 each, a can riser about $15, and a roll-out shelf kit $50 to $90. Most kitchens feel transformed for $75 to $150 spent on the two or three worst cabinets. Bigger hardware like pull-down units costs more, so save those for later.
How do I keep organized cabinets from sliding back into a mess? ▼
Two habits do it. First, everything gets a named home — a zone, a shelf, a labeled bin — so putting things away takes no nightly decisions. Second, run a quarterly 20-minute reset: shelf by shelf, strays back to their zone, expired things out, one donation pulled from the duplicates. Four short resets a year keep the system honest without any big annual clear-out.